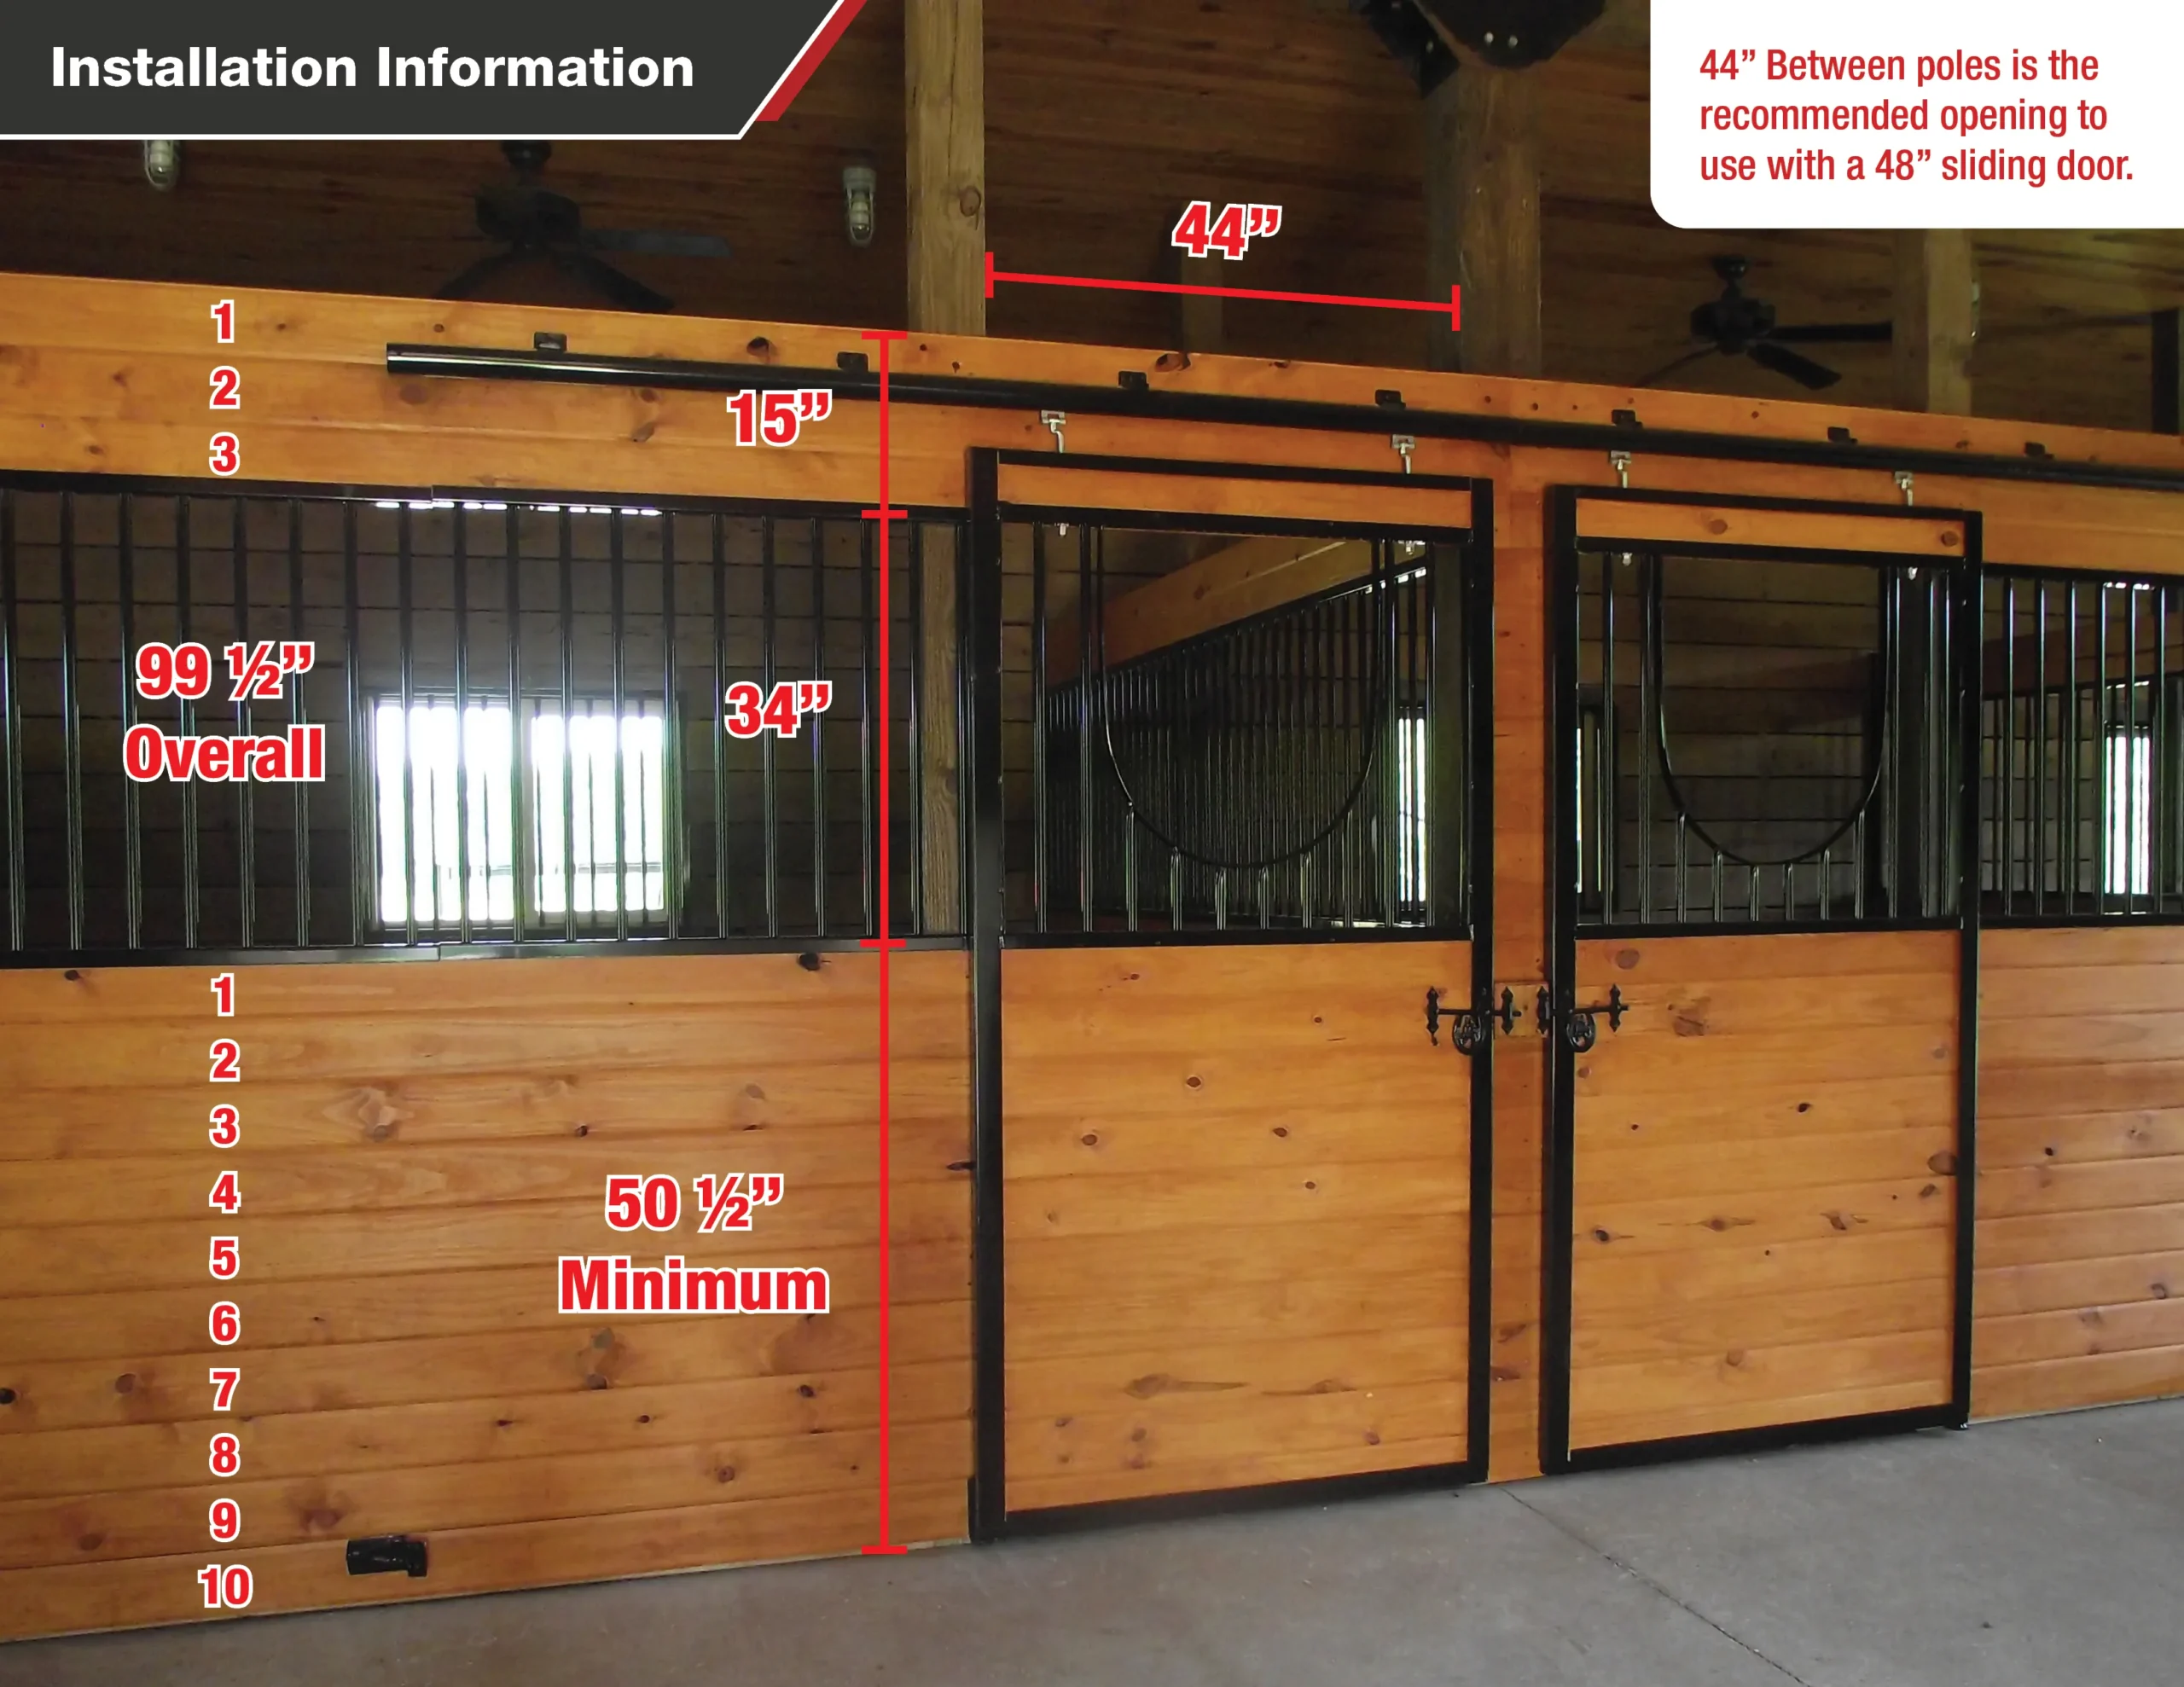
44" between poles is the recommended opening to use with a 48" sliding door.
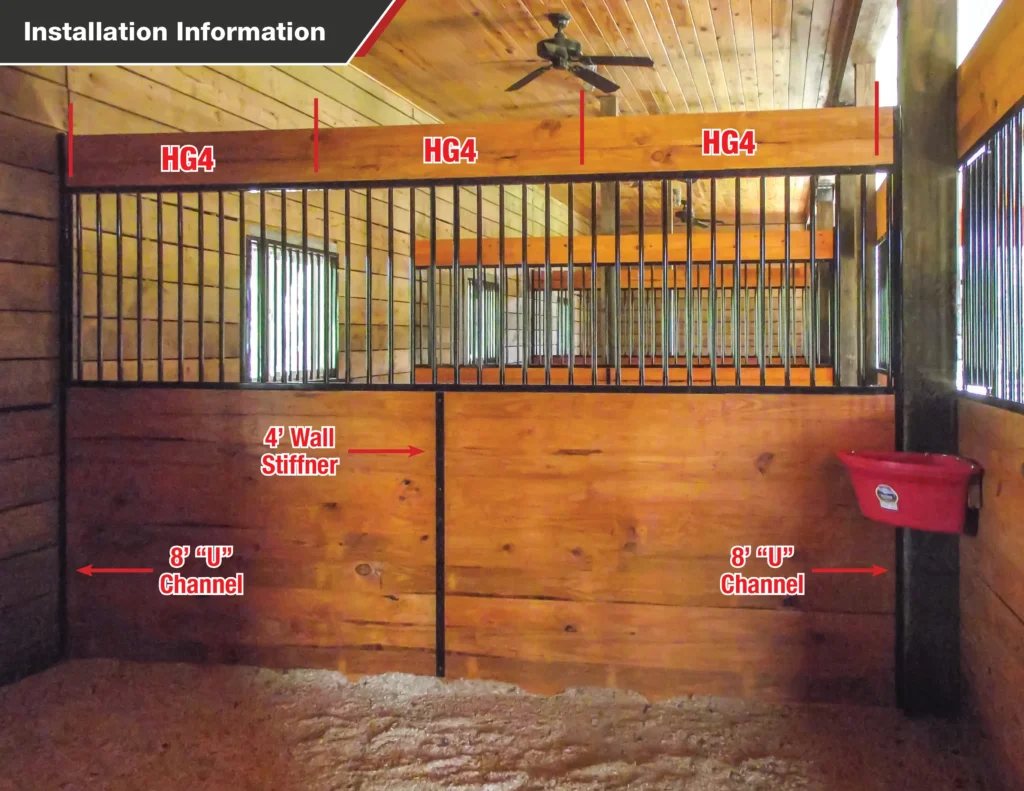
You always want the grills on the wall aligned with the grills on the door. To accomplish this, you need a minimum of 50 1/2" of wood on the front wall before setting the grill on top. Ten runs of 2x6 tongue and groove lumber work well.
Another three boards are needed above the grill to create a header where you will attach the door track. Our grills are 36" high with 34" long pickets. There is a channel at the top and bottom to accommodate 2x lumber. The door frames are 88" tall (around 89" with a guide channel).
Builder Installation Tips For Your New Horse Stall Kit
Installation Tip #1
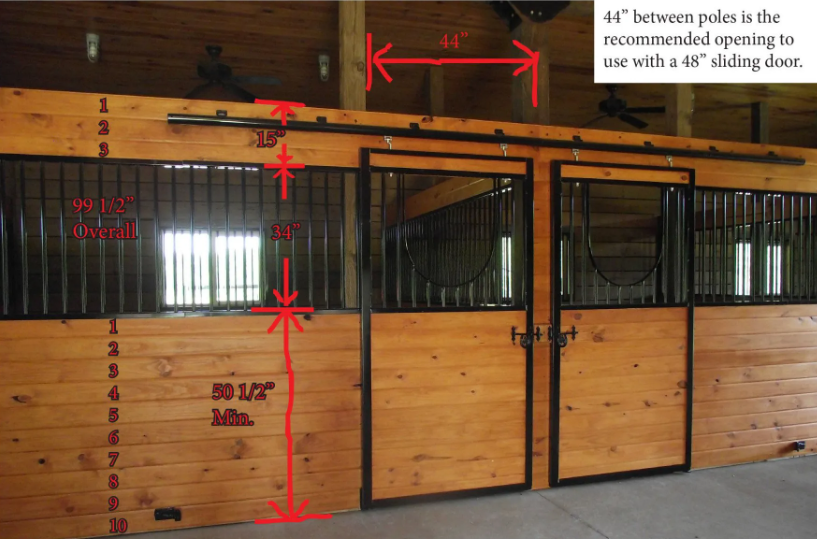
44" between poles is the recommended opening to use with a 48" sliding door.
Installation Tip #2
You always want the grills on the wall aligned with the grills on the door. To accomplish this, you need a minimum of 50 1/2" of wood on the front wall before setting the grill on top. Ten runs of 2x6 tongue and groove lumber work well.
Installation Tip #3
Another three boards are needed above the grill to create a header where you will attach the door track. Our grills are 36" high with 34" long pickets. There is a channel at the top and bottom to accommodate 2x lumber. The door frames are 88" tall (around 89" with a guide channel).
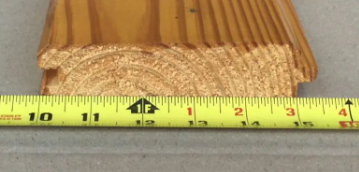
Tongue and groove 2x6 Southern Yellow Pine with beveled edge is a popular choice for stall fronts. All of our hardware is made to accommodate 2x lumber (1 1/2" actual width).
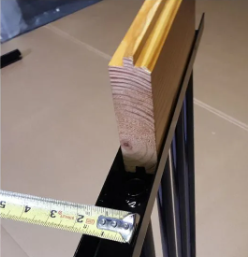
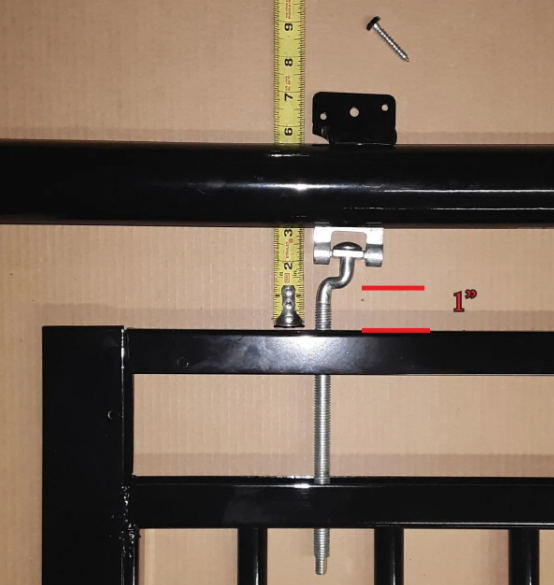
7" is a good distance to figure from the top of the door to the top of the track bracket.
You need about an inch of space between the top of the door and the "S-turn" in the trolley bolt. You need this gap available when you lift the door up over the guide pin bracket.
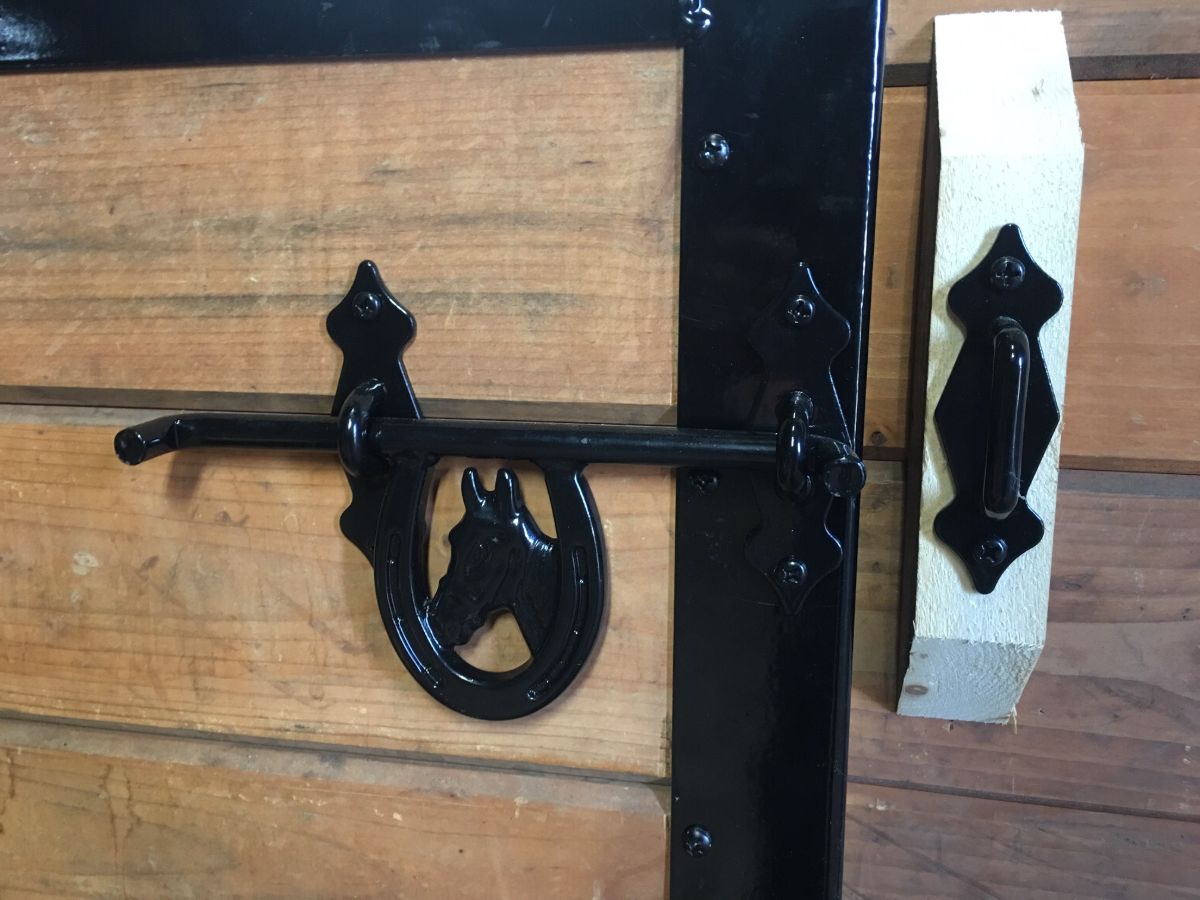
Holes must be drilled in the door frame to fasten the one latch piece. The boards behind the latch should be long enough so the screws that hold the latch can be screwed into wood.
This partition consists of 12 runs of 2x6 boards and 6 metal pieces provided by us.
2 pieces 8' U-Channel (one at each end)
3 pieces 4' Grill
1 piece 4' Wall Brace
Frequently Asked Questions
Still have some questions about our horse stall grill kits and hardware? Give us a call! We’re happy to answer any questions you have about ordering, shipping, installation, and more.